Quick version
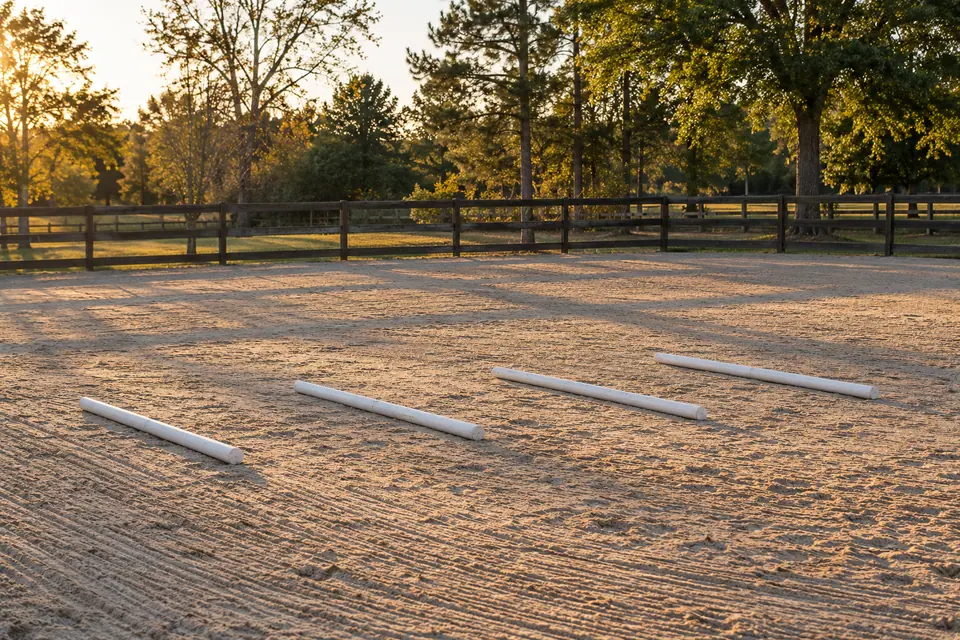
- Walk poles: roughly 2.5 to 3 feet apart for an average horse. Trot poles: roughly 4 feet.
- No tape measure? Use the heel-to-toe shoe method, or rake the arena and read the hoof prints.
- Raised poles ask for more joint bend, balance and core. Start flat.
- Change one variable at a time, then give your horse 3 to 4 passes each way.
- Rhythm and relaxation beat exact measurements.
What Are the Benefits of Ground Poles for Horses?
Studies show ground poles increase joint flexion, range of motion and core and back muscle activation. What they don't show is an instant, guaranteed longer stride, even though people often tell me that's what poles are for.
I tested it on Artie with poles at his own hoof prints, then 38 inches, then 42. In front, his hooves landed in the same spots every time; what changed was how much he bent his joints. A longer stride is built over time by strength, coordination, posture and body awareness, and poles help build those.
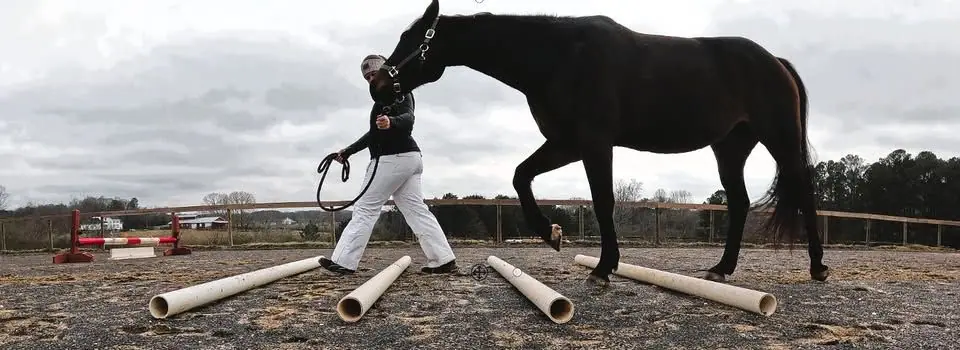
Before poles, I want a horse who can stand in a relaxed, neutral posture with me. And polework is exercise, so I do it on non-riding days.
Walk and trot pole spacing
The industry says "one large step." I find that wildly inconsistent, so here's what I use.
Rough distances
- Walk: about 2.5 feet (2.5 to 3 feet for a 16 hand horse)
- Trot: about 4 feet
The heel-to-toe method (walk poles)
Walk heel to toe from one pole to the next. For a women's size 9 shoe (about 10 inches):
| Horse height | Heel-to-toe steps between walk poles |
|---|---|
| 12 to 14hh | 2.5 to 3 steps |
| 15 to 17hh | 3 to 3.5 steps |
| 18hh and up | 3.5 to 4.5 steps |
In my size 8s (about 9.5 inches), three and a half steps is 2 feet 7 inches, right in range for a 16 hand horse. About 5 steps gets me to a 4 foot trot pole.
[CONFIRM WITH JEN: her trot spacing by horse size from the "Ground pole spacing guidelines for working trot" reel (DTdV78mjd0X). Add a trot table here if she's happy to.]
My tip: start at the shorter end for uncoordinated horses, and the longer end for big movers or if your goal is stride development. Then adjust: rhythm and relaxation matter more than exact measurements.
The rake method (100% accurate, every time)
Rake out a small section of your arena. I flip a pitchfork over to do it.
Walk your horse through it without interfering with their natural walk. You want clear hoof prints in the sand.
Place your walk poles directly between the hoof prints.
Repeat any time your horse isn't walking through the poles cleanly.
Watch the rake method on Instagram (opens in a new tab)
Should Ground Poles Be Flat or Raised?
Start flat. Once your horse walks through cleanly and calmly, raise the poles a few inches. Raised poles ask for:
- More joint range of motion through the shoulder, elbow, hip, stifle and hock.
- Better balance and coordination, as your horse organises each step.
- More core work, because they have to lift through the chest. (More on the core in belly lifts and the thoracic sling.)
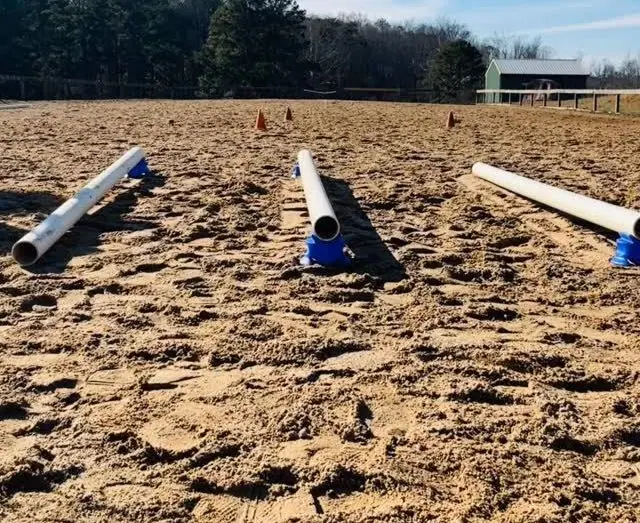
Uneven chest muscles? Set the poles with risers on one side only, raised on the side that's less developed, and walk your horse over them 3 to 5 times a week.
Zig-zag and arched poles
Zig-zag: lay 4 to 6 poles in a zig-zag; spacing doesn't matter much. Walk through slowly so your horse works out where to put their feet, and alternate directions. If they knock poles, veer away or hesitate, keep this one in the routine.
Arched (fanned) poles: I use these mostly for body awareness. You can see a horse truly thinking about their feet, especially after knocking a few!
A simple starter session
On a non-riding day, set out a few walk poles 2.5 to 3 feet apart.
Hand walk (or lunge at a walk) over them 2 to 3 times in each direction.
Raise the poles a few inches and repeat.
Finish with a few belly lifts.
Change one variable at a time
The mistake I see most: going from easy to everything in minutes (flat poles, raised poles, a rider, trotting). That creates bracing instead of better movement. Change only one of these at a time:
- Repetitions
- Number of poles
- Height
- Spacing
- Speed
- Load (adding a rider)
- Curves or turns
After each change, let your horse go through 3 to 4 times in each direction so their body can reorganise.
Building endurance (for show season, long rides and trails)
- 1 to 3 poles on the ground at a walk, 3 reps each direction
- Add more poles
- Increase to 4 to 6 reps each direction
- Repeat step 1 at a trot
- Repeat step 2 at a trot
- Repeat step 3 at a trot
- Repeat step 1 at a canter
- Repeat step 2 at a canter
- Repeat step 3 at a canter
Only move up when the step before is easy and relaxed. Canter is for horses already fit and comfortable at trot.
Why Does My Horse Keep Knocking Poles?
Knocking poles is almost never "clumsy" or "lazy." Usually your horse isn't using their body well, isn't focused, is crooked or is out of rhythm. Tip: video your session and check the hoof prints afterwards.

Want me to take a look?
I'd love to help set up a pole plan for your horse. I'm not running my seasonal in-hand polework program this winter, but I still teach it: I'm happy to show you polework during a session, I'll add pole patterns to your homework, and I teach polework clinics. Ask me about the next one.
Bodywork supports your horse's wellbeing alongside veterinary care. It is not a substitute for it. If your horse is lame, unwell or recovering from injury, please check with your vet first.
Free printable, arena friendly
The Pole Spacing Card
A free one-page PDF. Print it and pin it to the arena fence.
- The walk and trot distances
- The heel-to-toe table
- The 4-step rake method
- The 7 variables "change one at a time" list with tick boxes
- The 9-step endurance ladder
- 3 set-up sketches (straight walk poles, zig-zag, arched), and the safety lines